Search This Blog

Tuesday, September 26, 2017

Girlie Pasta Salad


Or maybe all pasta salads are girlie! Ha! One of my favorite Birmingham restaurants is Chez Lulu. The next time you're there, check out this fabulous little French cafe! The last time I went, I ordered the pasta of the day.  It was an unexpected blend of flavors that were delicious together.  Figs, carrots, almonds, cilantro and a white crumbled cheese gave the dish a memorable and unique taste.  Check out Chez Lulu here: www.chezlulu.us/about_chez_lulu.

With the Chez Lulu pasta in mind, I created this dish.  I'm always a fan of the sweet and savory and the unusual blending of flavors.  I also believe that food should be colorful.  The ingredients in this pasta provide plenty of vibrant color.  I think it would be perfect for a girls' night, spa day or Saturday  picnic.


Girlie Pasta Salad


Recipe:
2/3  box of Penne Pasta
1 Tbsp Olive Oil
1 clove Garlic, minced
3-4 slices of Pancetta or Bacon
1 Tbsp Cracked Red Pepper
1 bunch Fresh Kale, stems removed and chopped
1 cup Shredded Carrots
1 cup Feta Cheese
1 cup Sliced Grapes
1 cup Sliced Almonds (toasted)
1/2 cup Garlic Vinaigrette (recipe below)
Method:
1.  Cook pasta by the instructions on the box, strain and set aside.
2.  Heat olive oil over medium heat.  Add the garlic, pancetta and cracked red pepper.  Cook, stirring, for about 5 minutes.
3.  Add the kale and stir-fry until it has reached your desired tenderness.  Remove from heat.
4.  In a decorative bowl, combine the pasta with the kale mixture and add the remaining ingedients.
5.  Stir to combine.
6.  Serve warm or cold, topped with more cracked red pepper and/or honey drizzle.
Garlic Vinaigrette:
1/2 cup Olive Oil
1 Garlic Clove, minced
a splash of Red Wine Vinegar
1 tsp White Pepper
1 tsp Honey
1 tsp Dijon Mustard
*Whisk together all ingredients until well blended.


This recipe turned out quite tasty!  The grapes balance out the saltiness of the feta cheese, the carrots and almonds add a crunchy texture and the cracked red pepper gives the dish a kick of spiciness.  It is great warm or cold.  Also, if you make it the day before and store in the fridge overnight, the flavors meld beautifully!  I hope you feel inspired to try this recipe.  Let me know how it goes! -1CC


Wednesday, September 20, 2017

Curry Chicken Salad


I get really excited and inspired by all things international!  Something I enjoy doing on this blog and in my kitchen, is adding Asian and Mediterranean twists to deep South cooking.  The object of my innovation today is chicken salad.

Who in the South doesn't love a nice beige blob of creamy, mayonnaise-y chicken salad?  It's a completely delightful Southern staple!  My favorite version includes pecans and red grapes.  Being the Southern Belle that I am (ha!), I have sampled many a chicken salad recipe and would consider myself (as well as any other Southern gal) somewhat of a connoisseur!

You really can't improve the delicious, classic recipe of chicken salad...and I'm not trying to.  I just felt inspired to try a different version of it.  I incorporated my favorite warm Indian flavors, which give it a lovely flavor as well as an eye-pleasing golden color.


Curry Chicken Salad

Recipe:
2 Chicken Breasts (cooked)
3/4 cup Mayonnaise
2 Celery Sticks (chopped)
1/2 cup Sliced Almonds (toasted)
1/2 cup Dried Apricots (chopped)
1 small Apple (peeled and chopped)
1 teaspoon Curry Powder
1 teaspoon Coriander
1 teaspoon Turmeric
1 teaspoon Cinnamon
Cayenne Pepper for dusting the top
Method:
1.  In a food processor, pulse the chicken until ground.
2.  Transfer ground chicken to a medium-sized bowl and add all other ingredients except for cayenne pepper.
3.  Stir until blended and serve dusted with cayenne pepper.
*Note:  This is great to make ahead.  Store in a covered container in the fridge overnight for flavors to meld.


I have an extreme obsession with England.  Anglophile?  Is that the phrase?  Yes, I'm one of those.  My very first experience with Indian Curry was in London (my favorite place in the universe), at an authentic Indian restaurant. Curry is a very popular flavor over there. So that is the main reason I like to add it to so many recipes. Ha!  Indian flatbread or Naan was also present at that momentous, life-changing occasion.  I served my curry chicken salad with homemade Naan.


Here is a great recipe for it, if you would like to get adventurous and try it too: http://allrecipes.com/recipe/naan/   
I was a little nervous about making it. But it was much easier than I thought it would be.  So go for it!


I hope I've inspired you to get creative with different flavors and to turn classic Southern favorites into something new and fresh.  Happy cooking, curry-style!  -1CC


Saturday, September 16, 2017

Sweet Potato, Quinoa and Jalapeño Patties


In my younger years, it was easy to be healthy.  I got a kick out of just seeing how healthy I could eat from day to day.  I've noticed that aging challenges habitual good choice-making.  Maybe just because adulting is not always fun...maybe we just want to treat ourselves.  I don't know what it is, but it seems that more and more, I want to make the unhealthy choice.

Lately, I've been trying to be more intentional about making nutritious food choices.  As you know, it's always smart to incorporate an abundance of fruits and vegetables into your diet.  Today I got a little creative and tried something new with quinoa, sweet potatoes and spices.


Sweet Potato, Quinoa and Jalapeño Patties

Recipe:
1 cup cooked Quinoa
1 cup (cooked and mashed) Sweet Potato
1 Tbsp Olive Oil
1 small Onion, chopped
1 clove Garlic, minced
1/4 tsp Cumin
1/2 tsp Cinnamon
1/2 tsp Turmeric
1/2 tsp Curry Powder
1 fresh Jalapeño, finely chopped
a bit of Kerrygold, Organic Butter or light Olive Oil for frying
Method:
1.  Cook Quinoa by package instructions.
2. Peel and chop a medium-sized sweet potato.  Place in a bowl with a bit of water and cover.  Heat in the microwave for about four minutes or until potato is tender.  Mash and set aside.
3.  Heat the oil over medium heat and add the onions and garlic.  Cook until starting to get tender (about five minutes).
4.  Add the four spices to the onions and garlic and cook, stirring for about two more minutes.
5.  Pour in the quinoa and stir well, scraping the pan to pick up bits of spices or onion that might have stuck.  Remove from heat.
6.  In a bowl, blend together the quinoa mixture, sweet potato and fresh jalapeño.
7.  Heat the butter or oil (whichever you prefer) in a flat pan over medium heat and start to form the mixture into small patties.
8.  Cook for 3-5 minutes on each side, until the outside reaches desired brownedness (is that a word?) and crispiness.
9.  Serve immediately.


I thought these tasted delightful!  They would probably be best served with my cilantro tzatziki sauce (recipe below).  I think they would also pair well with a fried egg, for an energy-boosting breakfast or brunch.  

If you're like me and you'd rather dive into a cheeseburger and fries than a salad, try this recipe.  We all need to make sure we get enough fresh veggies in.  It's fun to get creative with cooking and it makes eating the healthy stuff a little more fun too!


Spicy Cilantro Tzatziki Sauce

Recipe:
1/2 Cucumber (peeled and deseeded)
1 Garlic Clove
handful of Cilantro
about a cup Plain Greek Yogurt
Salt and Pepper to taste
Cayenne Pepper to taste
Instructions:
In the food processor:
1. Blend the Cucumber, Garlic and Cilantro.

2.  Add all other ingredients and blend until smooth.


Friday, June 30, 2017

A Healthier Mexican Fix


I recently had the privilege of tasting a brand new product from a Memphis-based company called Tom's Tiny Kitchen.  They are known for their pimento cheese, but have very recently expanded to cheese dips.  They have three delicious flavors: Chipotle Bacon, Spicy Thai and Classic White.  These dips are now available in the deli section of Krogers all over Mississippi and I suggest you try them out very soon!!  For more information, click here: http://www.tomstinykitchen.com

Of course these dips are fabulous with chips, cold or hot!  My family and I can't stop dipping our tortilla chips!  But you know me...I love to be inspired by an ingredient and create a recipe around that flavor.  Today, I was thinking a healthier spin on the classic Mexican restaurant cheesy rice dish would be the perfect cloudy day comfort food.


Everyone has their preferences when it comes to veggies.  So take this idea and create your own masterpiece!  Today, the blend I used was kale, zucchini, orange bell pepper, onion and garlic with Tom's Classic White cheese dip.  You'll find my recipe below.


Tom's Cheesy Veggie Rice

Recipe:
1 cup (uncooked) rice
1/2 Onion
1 clove Garlic
1 Zuchini
1/2 Orange Bell Pepper
handful Fresh Kale
1/4 cup Tom's Tiny Kitchen Classic White Cheese Dip
1 teaspoon Cumin
juice of 1 Lime
Salt and Pepper to taste
Method:
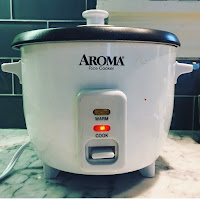
1.  Cook the rice according to package instructions.  I would recommend getting a rice cooker.  Mine makes my life so much easier!  It's great for couscous and quinoa too!
2.  Chop all the veggies and mince the garlic.
3.  Heat olive oil in a large pan over medium heat and add the onion and garlic.  Cook for about 5 minutes.
4.  Add all the other veggies, the cumin, lime juice and salt and pepper and cook for about 10 minutes, stirring often.
5.  Add the cooked rice and cheese dip to the veggie mixture and stir everything together until just combined.  Add any more salt, pepper, cumin or lime juice that is needed for a flavor that suits you.
6.  Serve immediately and enjoy a Mexican restaurant style night in!


As always, I love to share ideas I have in the hopes of inspiring you to get creative in the kitchen.  Today's recipe is quick, easy and comforting.  I can't say it's necessarily diet-friendly, but it is a way to add more servings of vegetables to your day.  I would love for you to share your version of this recipe and others!  Contact me any time and be sure to follow 1cookingchick on Instagram for daily food inspiration!  Love to all!  1CC


Wednesday, May 3, 2017

Alfajores


I've told you before how bad I am at baking.  I think I've compared the aesthetics of my chocolate chip cookies to some sort of post-apocalyptic dystopian creature.  In other words, when I try to create lovely cookies, I fail miserably.  So what to do?  Grab a friend that's good at baking and make her help me, that's what!  Ha!


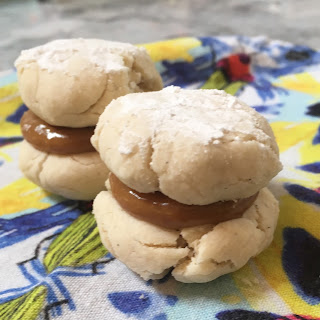
A few years back, my cousin went on a mission trip to Argentina.  As a souvenir, she brought me the most divine confection I have ever tasted...Alfajores!  These are a traditional sandwich cookie found in Argentina, Chile, Peru, Uruguay, Paraguay and Southern Brazil.  Though flavors can vary, the filling is usually dulce de leche and the outside is usually coated with powdered sugar.


If I were going to sing a love song to a food, it would be dulce de leche!  I mean, have you ever tasted it?  The flavor is just rich and multi-layered.  By definition, it is simply burned sweet milk.  I believe that if one could eat a million dollars, it would taste like dulce de leche!

There is a very simple method for making your own.  You boil a can of sweetened condensed milk for three hours.  That's it.  Ha!  Oh be sure and remove the label from the can first.  Yikes!


Seriously, just put that whole can in there.  Don't open it.  One other thing, make sure the water level covers the can(s) for the full three hours.  You might have to add water a few times.


So back to the sadness that is my baked products:


This was my solo attempt at making alfajores.  Pretty ugly, huh?  Also, these cookies turned out super crumbly.  They just turned to dust if I touched them.
They reminded me of Mother Gothel in Tangled, when she lost access to Rapunzel's healing hair that was keeping her ageless and she just turned to dust.  My solo cookies were Mother Gothel cookies!  Sad!


This is where my good friend Erin comes in!
Skilled baker to the rescue!
For the cookies, we used Vianney's Alfajores recipe from Sweet Life blog:


Erin's baking tips for me:
1.  Butter for cookies should be room temperature.  It should get that way by sitting out on the counter for at least an hour.  Putting it in the microwave or even in the sun to soften, makes it softer on the outside than it is in the middle.  It should be uniformly soft, through and though.  
2.  Something you can do to achieve room temperature butter faster is to unwrap it and cut it into small pieces.  This increases the surface area so that more warm air can circulate around.
3.  If you use a lot of flour to roll out the dough, it can change the flavor.  Powdered sugar is good to use...but this can make it too sweet.  She likes to use a mixture of flour and powdered to sugar to roll out cookies.
4.  When using a rolling pin to roll out cookie dough, be very gentle.  Do not press down too hard and carefully roll dough out so that it is evenly flattened.  


With Erin's help, I created these perfectly round specimens that are ready to pop in the oven.  This has seriously never happened before!


Here they are, the glorious result of my baking afternoon with my friend!  They turned out beautiful and delicious!  They tasted just like what I remember my cousin bringing me back from her Argentinian travels.


I can't say that I'm suddenly an excellent or confident baker.  Actually, I'm probably still pretty bad at it. Ha!  But I will remember the tips I learned for next time.  Any baking extravaganzas I participate in may always have to be with my skilled friends.  Oh well, that makes it more fun anyway!  -1CC


Wednesday, April 19, 2017

Authentic Indian Lunch


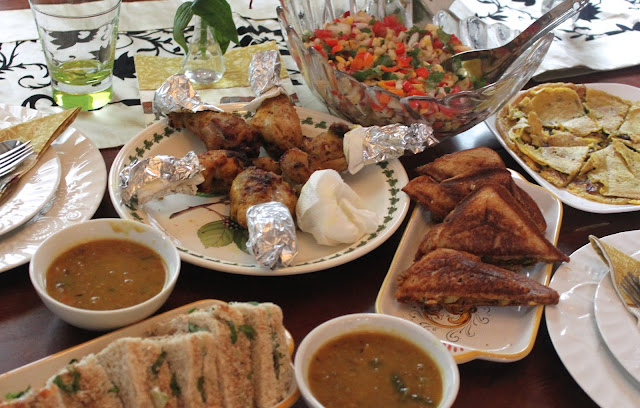
My lunch today was a beautiful celebration in the mouth!  So many flavors came together to form a truly exquisite feast.  Cilantro, mint, curry, cardamom, coriander and cumin were all team players in this artistic cuisine experience.


My friend Sunita, invited me over to enjoy lunch and to show me how to cook real chicken curry.  I have to say, not many lunches i've had in my lifetime have been more inspiring or enjoyable than this one!


The first thing I learned from Sunita is that in any Indian kitchen you will find a spice box.  This holds whole spices that have not been processed at all.  For example, she grinds and toasts her own cumin and cardamom.  She makes her own tikka masala spice blend.  You should smell these flavors!  Oh yum!


Any great feast starts with a salad.  This elegant dish was crisp, sweet and savory.  Sunita doesn't go by a recipe, but here is the approximate method she used to bring together this party in a bowl.

Ingredients:
1 Apple
1 Asian Pear
1 Cucumber
2-3 Radishes
1/2 cup Roasted Corn
1 Red or Orange Bell Pepper
Handful of Cilantro
1/2 cup Pine Nuts
1/2 cup Apple Cider Vinegar
1 Tablespoon Sugar
Salt and Pepper to taste
Instructions:
Dice all fruits and vegetables and roast corn over medium-high heat until starting to brown.  Whisk together vinegar, sugar, salt and pepper.  Toss all ingredients together in a decorative bowl with the vinegar mixture and serve.


We've probably all had cucumber sandwiches at one time or another.  I was really inspired by Sunita's version of this classic.  She makes them a little healthier by using mostly Greek yogurt with a small amount of cream cheese.  Her garnish of fresh basil and sesame seeds really take them to the next level of foodie-pleasing status!

Ingredients:
(makes 4 sandwiches)
1 cup Plain Greek Yogurt
1/4 cup Cream Cheese
handful fresh Dill (chopped)
1 Cucumber (peeled, seeded and diced)
Salt and Pepper to taste
8 slices Whole Wheat Bread
Sesame Seeds and Fresh Basil for garnish
Instructions:
In  a bowl, mix yogurt, cream cheese, dill, cucumber and salt and pepper together. A helpful hint here is to dry the cucumber as much as you can so that the juices don't make your filling too runny.  You can do this with paper towels and you dice it.  Cut the crust off of the bread and spread mixture evenly on the bread and form the sandwiches.  If you would like to make them fancy, cut each sandwich into four triangles.  Pour your sesame seeds onto a plate and simply dip the sides of each sandwich into them.  Place on a decorative plate and top with the basil.


After lunch, my friend taught me how to make true Chicken Curry.  Let me just tell you, it looks, smells and tastes amazing!


And here is a word and recipe from Sunita herself...
Food transcends all boundaries. It brings people together.  I want to thank Lauren for allowing me to share a cooking experience. I enjoyed creating a dish and spending time with her. Though I am not an expert cook, I love cooking with my family and friends.

Lauren and I cooked butter chicken. Here is the recipe:

Ingredients to marinate chicken:

Chicken breasts (3) (cut into small cubes)
Yogurt (thick and whisked) (1/2 cup)
Ginger paste (2 teaspoons)
Garlic paste (2 teaspoons)
Coriander powder (1 teaspoon)
Cumin powder (1 teaspoon)
Light olive oil (3 teaspoons)
Lemon juice (1 tablespoon)
Salt and pepper according to taste
Turmeric powder (1 teaspoon) (optional)

Marinate for at least 2 hours, but preferably overnight

Ingredients for gravy:

Onions (2) thinly chopped
Ginger garlic paste (2 teaspoons) 
Tomato puree (1 cup)
Cumin powder (1 teaspoon) (dry ingredient)
Coriander (1 teaspoon) (dry ingredient)
Cinnamon stick (1/2) (dry ingredient)
Red chilly powder (according to taste) (dry ingredient)
“Garam masala” or any Curry powder (1 tablespoon) (dry ingredient)
Butter (2 teaspoons)
Vegetable oil (2 tablespoons)
Salt and pepper according to taste
Fresh chopped cilantro for garnish
Water (1 cup)


Instructions for cooking:

Grill chicken or broil in oven (400 degrees for 15-20 minutes)
Heat the pan
Add butter and oil with cinnamon stick
Sautee onion till translucent, then add ginger garlic paste on medium heat
Cook for 2 minutes
Add tomato puree
Cook for 5-6 minutes with the lid on 
Add all dry ingredients, salt according to taste
Cook an additional 5-10 minutes
Add cream and cook for 5 minutes
Add previously cooked chicken
Pour water
Mix to a boil and simmer for 5-10 minutes
Turn off the stove
Garnish with cilantro

Serve and enjoy with rice or naan


Food is fun and inspiring because it bonds people together.  I love how cooking and eating with others leads to closer relationships.  Just spending time in someone's kitchen creates opportunities to tell life stories and find out what all you have in common with them.  I hope after reading this, you will be inspired to reach out to someone you would like to get to know better and invite them over to cook and eat with you.   Try one of my recipes and tell your friend about 1cookingchick!  Love to all! -1CC


Tuesday, April 4, 2017

Chunky Greek Orzo Salad


If I had a very large quantity of this salad and a diving board overhead, I would literally dive in head first!  There are just some flavor blends that work.  The mix and meld of fresh basil, garlic, kalamata olives, cucumber, tomatoes and feta cheese is a timeless classic that agrees most taste buds that I'm acquainted with...even those that are only a few years old!  My kids love all these foods.  Orzo, a small, rice-shaped pasta, is the perfect canvas for the artful taste these combined ingredients create.


Chunky Greek Orzo Salad

Recipe:
8 oz. Orzo Pasta (cooked)
2 Cucumbers 
1 box Cherry Tomatoes
1 jar Kalamata Olives (drained and rinsed)
1/2 Red Onion
1 package Feta Cheese Crumbles
Handful of fresh Basil Leaves
Vinaigrette:
3/4 cup Olive Oil
splash of Red Wine Vinegar
2 minced Garlic Cloves
Salt and Pepper to taste
Instructions:
1.  While the pasta is boiling, peel and finely chop the cucumber.  Slice the cherry tomatoes in half, finely chop the olives and red onion and roughly chop the basil leaves.
2.  Mix all ingredients in a decorative bowl or large tupperware if making ahead.
3. In a measuring cup, whisk vinaigrette ingredients and then pour over the salad.
4.  Stir everything together and enjoy.


Packed with veggies, this would be a great make-ahead lunch for a busy work week...that would leave you feeling energized throughout the rest of your day.  Want to make it one level healthier?  Substitute a healthy grain like quinoa or farro for the pasta.  The picnic season is upon us!  So make this the next time your family and friends gather for a lovely outdoor feast!